How to Create a Haunted Dessert Table: Tips and Tricks
Halloween is the perfect time to go all out with a spooky, sweet dessert table that will have your guests talking long after the last crumb has been devoured. Whether you're hosting a Halloween party or just want to add a touch of fright to your festivities, a haunted dessert table can be the highlight of the event. Here’s how to create a chillingly delightful dessert table that’s sure to impress.
👻 Choose a Spooky Theme
Start by deciding on a theme that fits the mood you want to create. Whether you opt for a classic haunted house, a witch's lair, or a creepy graveyard, make sure your theme is reflected in every aspect of your dessert table. For a Halloween twist, you could choose themes like "Witch’s Brew" or "Ghostly Gala."
🎃 Set the Scene with Decor
Tablecloth: Use a black or deep purple tablecloth as the base. For added drama, layer it with a spiderweb table runner or cheesecloth.
Centerpiece: Create a spooky centerpiece using faux cobwebs, skeleton hands, or a Halloween-themed bouquet. You could also use a tiered cake stand to display your desserts.
Lighting: Dim the lights and use candles (real or battery-operated) for an eerie glow. Add some Halloween-themed string lights for a festive touch.
Serving Ware: Choose serving dishes that match your theme. Think black platters, skeleton-themed trays, or even cauldron-shaped bowls.

🧁 Feature Themed Treats - Recipes Below ⬇️⬇️⬇️At the bottom of the post ⬇️
These rich, red velvet cupcakes topped with a swirl of cream cheese frosting and a splash of red velvet “blood” (a drizzle of red-colored syrup) are both spooky and delicious. Use edible glitter or candy eyeballs to add an extra touch of fright.
Graveyard Pudding Cups: Serve chocolate or vanilla pudding in small cups, and top with crushed chocolate cookies to mimic dirt. Add gummy worms and tombstone-shaped cookies for a graveyard effect. For extra fun, let kids write spooky names on the tombstones. The recipe is below, but to save time use a boxed pudding mix.
Skeleton Cookies: Decorate sugar cookies with royal icing to create skeleton shapes. Use black icing for the bones and white for the skulls. Arrange them in a playful or eerie display, depending on your theme.
🍬 Add Ghoulish Garnishes
Edible Eyes: Use candy eyeballs to give your treats a creepy look. Place them on cupcakes, cookies, or even in the middle of a cake.
Spooky Sprinkles: Choose Halloween-themed sprinkles, like bats, ghosts, and orange and black pearls, to sprinkle over cupcakes, cakes, and cookies.
Creepy Crawly Candy: Place gummy spiders, worms, or other creepy candy around your dessert table for a playful touch.
🍁 Organize with Style
Height and Levels: Use different heights to create visual interest. Stack cakes on cake stands, arrange cupcakes on tiered trays, and place small treats in glass jars at varying levels.
Label Everything: Create spooky labels for each dessert using themed tags or labels. Add fun names and a short description to match the Halloween theme.
Table Accessories: Use mini skeletons, plastic rats, or other Halloween props as table accessories. Scatter them around your dessert table for a fun and spooky effect.
🧡 Prepare Ahead of Time
Bake in Advance: Many desserts can be made ahead of time. Bake cupcakes, cookies, and other treats a day or two before your event, and store them properly.
Set Up the Day Before: Decorate and arrange your dessert table the day before to avoid last-minute stress. This will give you time to make adjustments and ensure everything is perfect for the big day.
Creating a haunted dessert table is a fantastic way to add some spooky fun to your Halloween celebrations. With a little creativity and some eerie decorations, you can transform your dessert spread into a frightfully delightful experience. Remember to have fun with your theme, get a little spooky, and enjoy the compliments on your ghoulishly great treats!
Happy haunting and happy Halloween! 🎃👻🍬
Recipes are below ⬇️⬇️⬇️⬇️
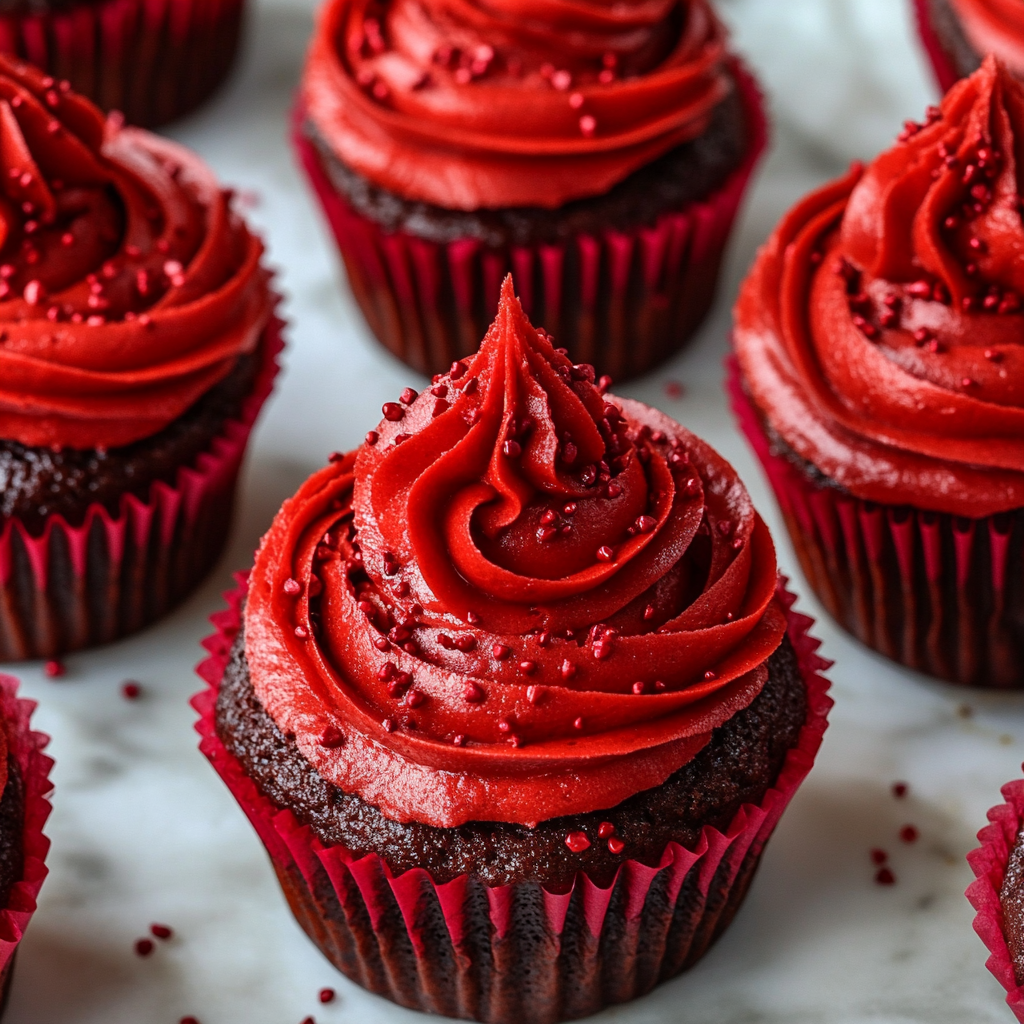
Blood Red Velvet Cupcakes
Red velvet cupcakes are perfect for Halloween
Ingredients:
For the Cupcakes:
1 cup all-purpose flour
3/4 cup granulated sugar
1/2 tsp baking powder
1/4 tsp baking soda
1/4 tsp salt
1/4 cup vegetable oil
1 large egg
2 tbsp unsweetened cocoa powder
1/2 cup buttermilk
1 tbsp red gel food coloring
1/2 tsp vanilla extract
1/2 tsp white vinegar
For the Frosting:
1/2 cup unsalted butter, softened
2 cups cream cheese, softened
3 ½ cups powdered sugar
1/2 tsp vanilla extract
red gel food coloring (optional, for extra color)
For the Blood Drizzle:
1/4 cup red candy melts or red chocolate
1 tbsp vegetable oil
Instructions:
Preheat your oven to 175°C (350°F). Line a 12-cup muffin tin with cupcake liners.
In a bowl, sift together flour, sugar, baking powder, baking soda, and salt.
In another bowl, whisk together the vegetable oil, egg, cocoa powder, buttermilk, red gel food coloring, vanilla extract, and vinegar until well combined.
Gradually add the dry ingredients to the wet ingredients, mixing until just combined. Divide the batter evenly among the cupcake liners. Bake for 18-20 minutes or until a toothpick inserted into the center comes out clean. Let the cupcakes cool completely on a wire rack.
Beat the butter and cream cheese together until smooth. Gradually add powdered sugar and vanilla extract, beating until light and fluffy. If desired, mix in red food coloring.
Melt the red candy melts or chocolate with vegetable oil in the microwave, stirring until smooth. Drizzle over the frosted cupcakes for a “bloody” effect.
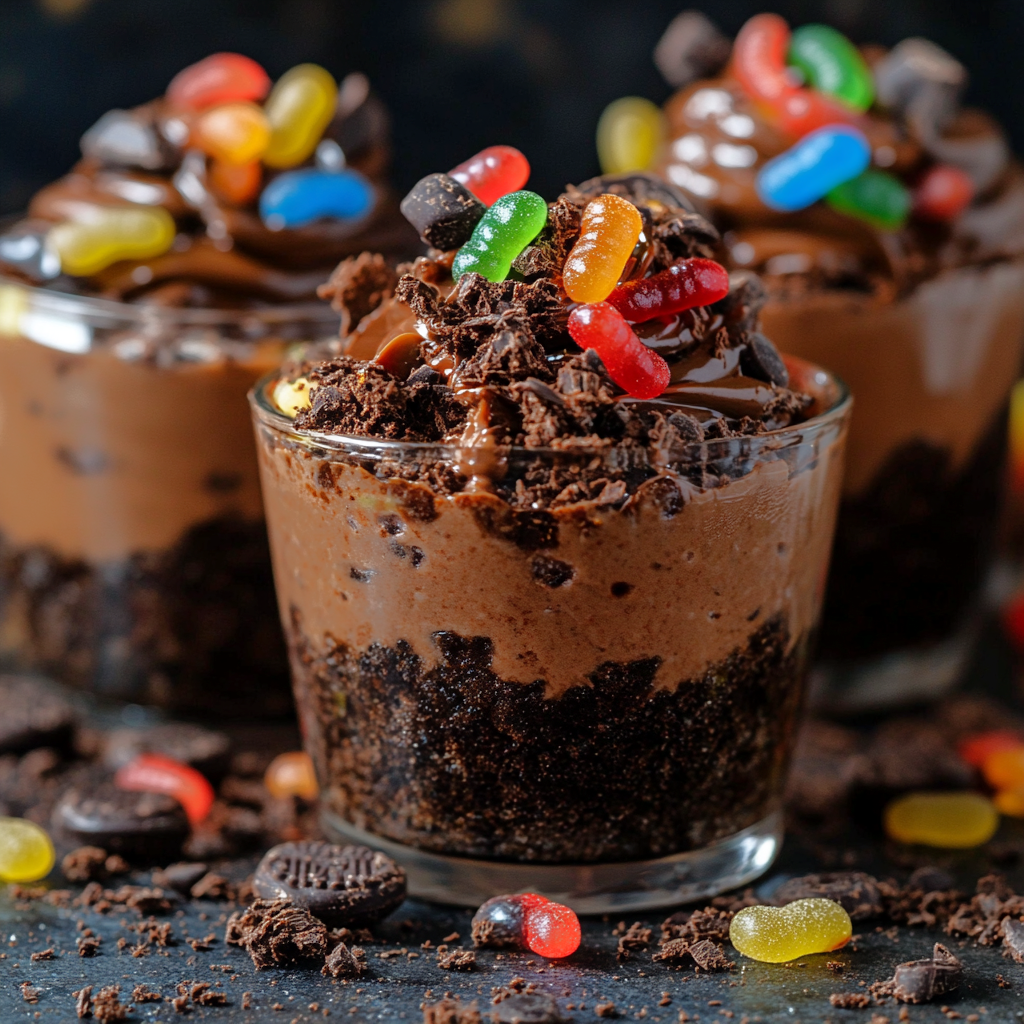
Graveyard Pudding Cups
Graveyard pudding cups! So easy to make, and if you are in a huge rush use a pudding mix to save time
Ingredients:
For the Pudding:
2 cups whole milk
1/2 cup granulated sugar
3 tbsp cornstarch
1/4 tsp salt
1 tsp vanilla extract
2 tbsp unsweetened cocoa powder (for chocolate pudding)
For Assembly:
1 cup chocolate cookies, crushed
Gummy worms
6-8 small tombstone-shaped cookies
Edible markers (optional, for writing on tombstones)
Instructions:
In a saucepan, whisk together sugar, cornstarch, and salt. Gradually whisk in milk until smooth. Cook over medium heat, stirring constantly until the mixture thickens and begins to bubble. Remove from heat and stir in vanilla extract. For chocolate pudding, mix in cocoa powder until smooth. Pour the pudding into individual cups and chill until set (about 2 hours).
Once the pudding is set, top with crushed chocolate cookies to create the “dirt” effect. Place gummy worms on top of the crushed cookies. Decorate with tombstone cookies. Optionally, use edible markers to write spooky names or messages on the “tombstones”.
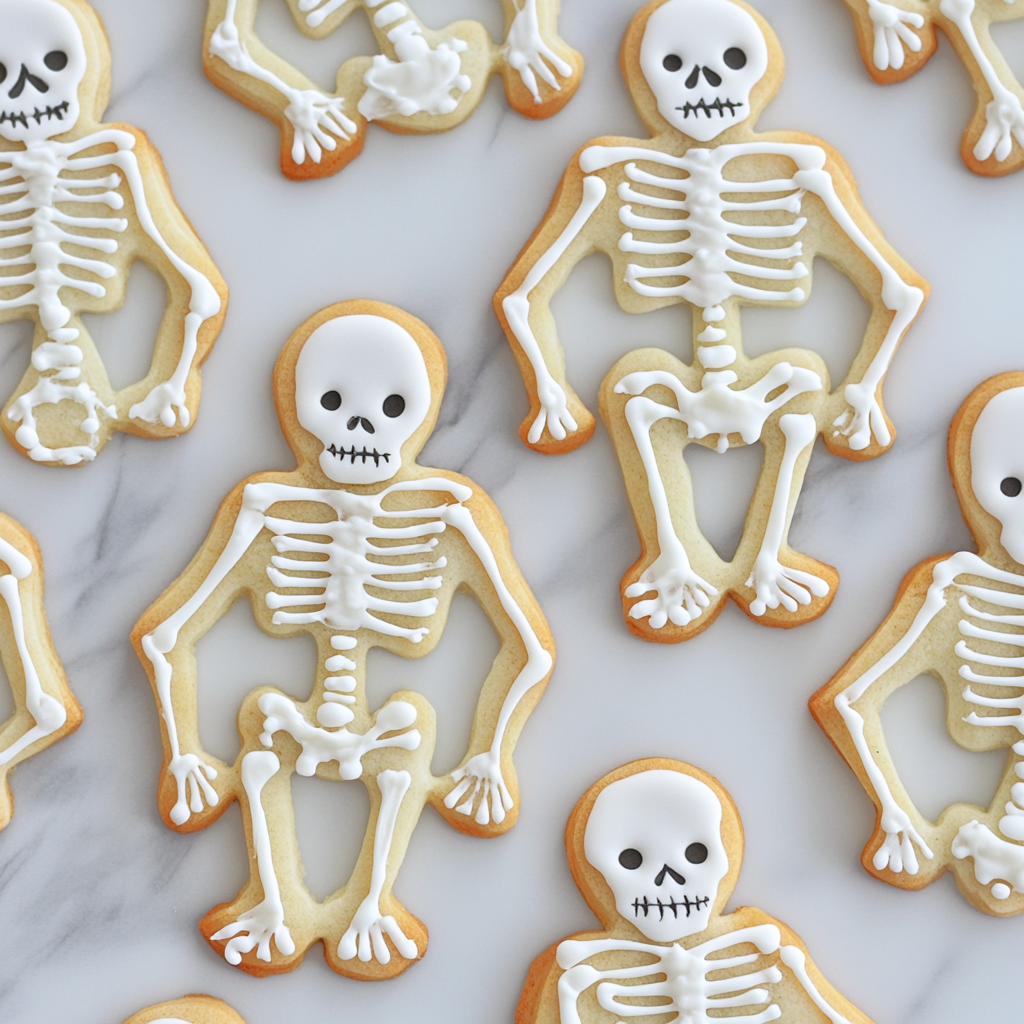
Skeleton Cookies
Skeleton sugar cookies are more sweet than scary
Ingredients:
For the Cookies:
2 cups all-purpose flour
1/2 tsp baking powder
1/4 tsp salt
1/2 cup unsalted butter, softened
1/2 cup granulated sugar
1 large egg
1/2 tsp vanilla extract
For the Royal Icing:
1 egg white
1 ¼ cups powdered sugar
1/2 tsp lemon juice
Black and white food coloring
Instructions:
In a bowl, mix flour, baking powder, and salt. In another bowl, beat butter and sugar until light and fluffy. Beat in the egg and vanilla extract. Gradually add the flour mixture, mixing until combined. Chill the dough in the refrigerator for at least 1 hour.
Preheat oven to 180°C (350°F). Roll out the chilled dough on a lightly floured surface to about 1/4-inch thickness. Cut out skeleton shapes using a cookie cutter or template. Place cookies on a baking sheet lined with parchment paper.
Bake for 8-10 minutes or until edges are lightly golden. Let cool on a wire rack.
Beat egg white until frothy. Gradually add powdered sugar and lemon juice, beating until stiff peaks form.Divide icing into bowls and tint with black and white food coloring. Use a piping bag to outline and fill the cookies to create skeleton designs.
Enjoy these spooky and festive treats at your Halloween party! 🎃👻🍪
